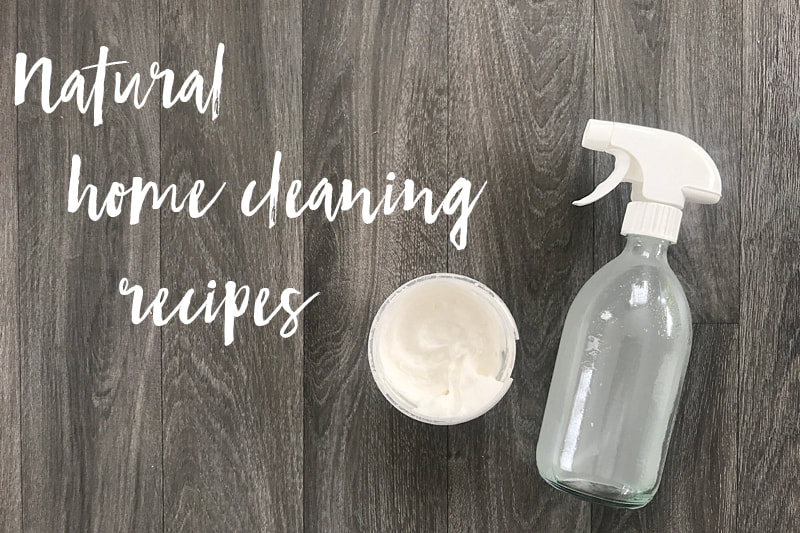
 Cleaning pasteThis beauty is my go-to for any hard to clean areas or when I'm doing a deep clean! From getting burnt on food off pots, to getting the sink shiny again. I use it in the bathroom to scrub grime and soap scum off surfaces too! I love this cleaning paste. PLUS it's so simple to make and lasts for ages! Place 1 cup of baking soda in a small bowl (or straight into whatever air-tight container you're going to keep this paste in, a jam jar or honey pottle works great) and then add about 1/4 cup of castile liquid soap (I use Dr Bronner's). [ie: 4 parts baking soda + 1 part castile liquid soap]. Add in 10 drops of essential oil if you want - try peppermint or anything citrus. Mix together until it forms a thick paste. Add a little water or more soap if it's a too dry. Store in an air-tight container and use as you need it. I find a small teaspoon size dollop is all I need for most applications. Apply to dirty surface & scrub, you can add a little water or cleaning spray (below) to surface as well to help the paste along. Cleaning sprayThis spray lives on the bench because I use it every day when wiping down kitchen surfaces. I used to love using store bought spray & wipe with the 'pretty' smells but now I have this more eco-friendly, safer alternative I haven't looked back. And I love knowing the beautiful smell is essential oils and not fake, cheap fragrances derived from chemicals! Add 1 tbsp of baking soda, 1 tbsp of castile liquid soap & 10-20 drops of your choice of essential oils (use ones that have cleaning or disinfecting properties like tea tree, lemon, peppermint, eucalyptus or rosemary) to a spray bottle and then top up with water. Shake well before each use to re-combine all the ingredients. Disinfectant spray / glass cleanerThis spray does two jobs - great for cleaning glass and it also has disinfecting properties with the vinegar and lemon essential oil. Now who doesn't love a multi-tasker?! I use this spray on windows (or pour a 1/4 cup into my bucket of hot water, along with a little castile liquid soap, if I'm doing a full window clean), bench surfaces, chopping boards, toilet seats, door handles etc and I spray my cleaning brushes & scrubbers with it before dousing them with boiling water to disinfect. Simply half fill a spray bottle with white vinegar, then add filtered/boiled/distilled water to the top. (ie: 1 part vinegar + 1 part water). Add 20 drops of lemon essential oil (a natural degreaser, smells divine and is known for it's antimicrobial qualities). Pop the spray trigger on top of your bottle and you're done. Shake well before each use to re-disperse the essential oil. When using as a disinfectant spray just apply to the area and leave to dry. When using to clean glass (or stainless steel) spray on then buff off with a cloth.
3 Comments
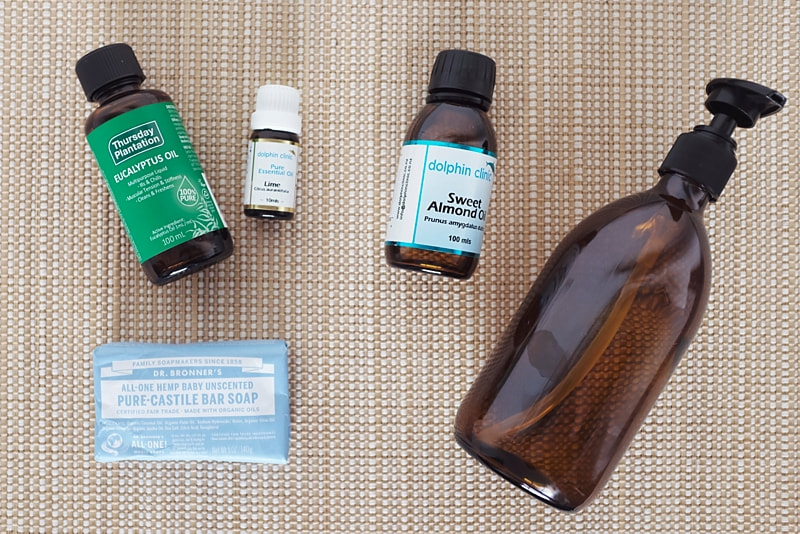 I've been looking for ways to reduce the chemicals we bring into our home and a main one is in the cleaning products we use. While a simple bar of soap in the shower and bathroom may be sufficient, I found it is definitely more convenient to have a pump bottle of liquid hand wash in the kitchen at least. So I decided to have a go at making a natural, homemade liquid soap. I found a multitude of recipes online and in books but the first couple I tried were either not cost-effective or were not of a consistency I enjoyed.
This recipe works out in the long run similar in cost to buying liquid hand wash at the supermarket. But I love that I know exactly what I'm putting on my skin. There's no sodium laurel sulphates which are known for causing skin allergies and reactions. I have sensitive skin and get eczema so this is a big plus for me. (If you have a go at making this recipe & don't use a Castile soap be sure to check out the soap ingredients!) I've spent a few months trialling this recipe and have just made a second batch. The first batch I made 2 litres worth of it which was probably overkill, but I used a whole solid soap bar and had to keep adding water until I got the soap to a consistency I liked. So I've halved the recipe to a more manageable quantity and am happy with the results. It is different to the liquid hand washes you buy from the supermarket but it does the job and I won't be changing back to store bought. You can switch out the eucalyptus & lime essential oils for others of your choosing. Peppermint. Sweet orange. Lavendar. So many options! Eucalyptus is known for it's cleaning properties and goes well with lime. I used grapefruit & orange for my second batch. The sweet almond oil in the recipe is nourishing and moisturising making this soap recipe gentle on your hands. YOU WILL NEED:
HOW TO MAKE:
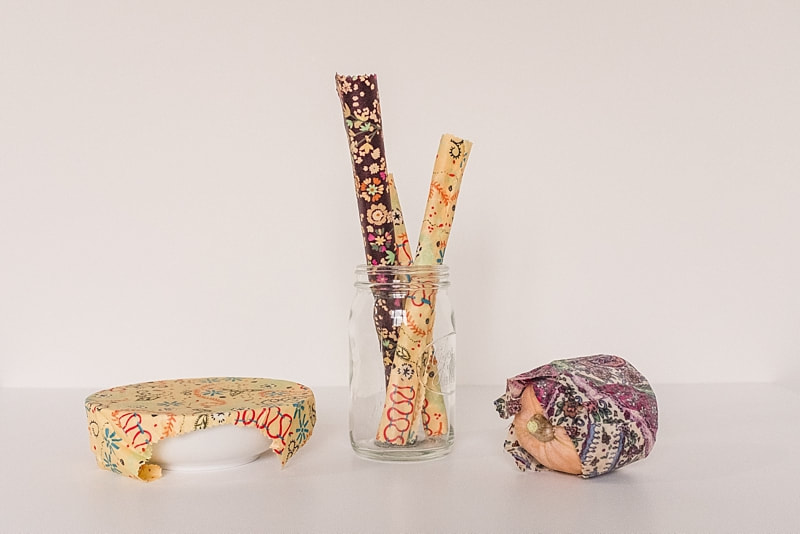 In our efforts to reduce our plastic use we've started using environmentally friendly beeswax wraps instead of plastic clingfilm. Last month I made a small batch of cotton cloth beeswax wraps to trial and we've enjoyed using them since to cover plates & bowls of leftovers in the fridge, half-used vegetables and to wrap up baking, bread, cheese and more. In case you haven't heard of these popular beeswax wraps before they're very easy to use; you simply cover your container or food with the wrap using the warmth of your hands to mould it around the edge of your container or food, adhering the wrap to the container, food or itself. Beeswax wraps are easily washed in cool, soapy water and can be re-used for months & months. In fact I'd say you could keep them forever if you maintain them correctly! You can buy these wraps from a number of NZ companies and at markets but I wanted to have a go at making them myself. There are plenty of recipes on Google for these wraps, all varying slightly. A lot include tree resin however it's not as easy to source locally as beeswax is and I've read mixed information about the safety of the fumes that come with heating the resin up. The resin is used to add more 'clingy-ness' and durability to the wrap but I decided I would make mine without the tree resin and see what I thought. After using our first batch of wraps for a month, neither Matt or myself think they lack 'cling' factor and reckon they adhere to everything just fine. On Sunday we spent an hour in the kitchen together making up another batch of beeswax wraps of varying sizes and shapes to add to our collection. Here's how we did it if you want to have a go yourself... YOU WILL NEED:
HOW TO MAKE: 1. Preheat your oven to 100 degress Celcius on bake. 2. Cut your cotton fabric to the sizes you want, using pinking shears so the edges don't fray. A variety of sizes and shapes is good for different uses. 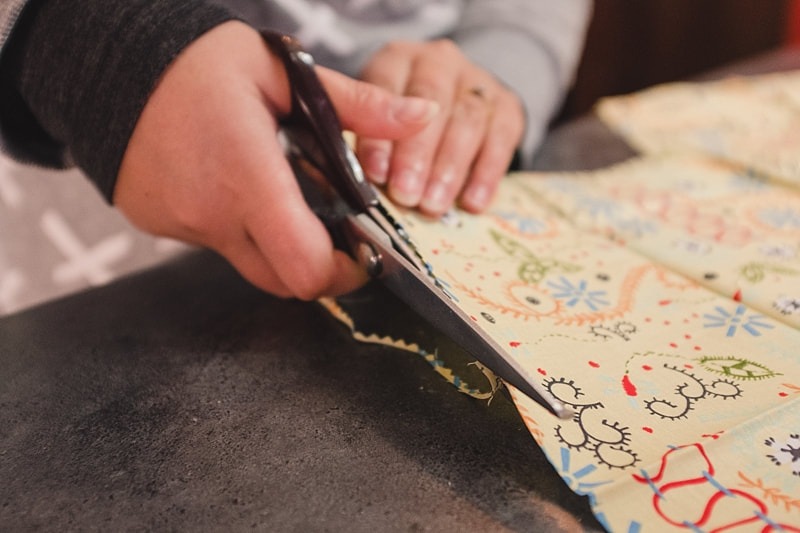 3. Place your beeswax and jojoba oil in a saucepan, over a low heat, to melt. If you want to add tree resin to your recipe you would just add in 20 grams of it in with your beeswax and oil here. Use a spatula to stir the mixture. 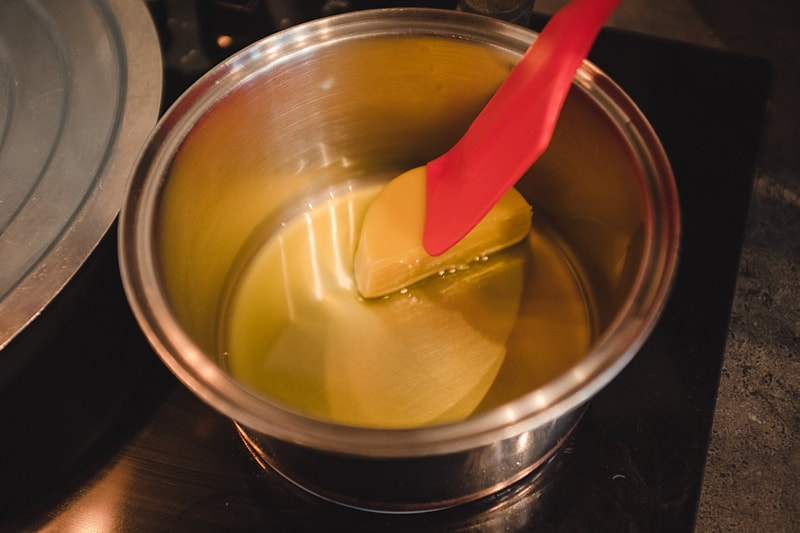 4. Lay one of your cotton wraps on your tin-foil or baking paper lined oven tray. Once your beeswax mixture is fully melted use an old paintbrush to apply an even, liberal coating of the beeswax to your fabric. You will need to work fast as the beeswax will cool and solidify fast. Make sure there aren't any dry areas of fabric. You want to apply enough beeswax to soak through the whole fabric piece once you've heated it in the oven (in the next step), but not so much that you will have excess beeswax pooled on top of the fabric. 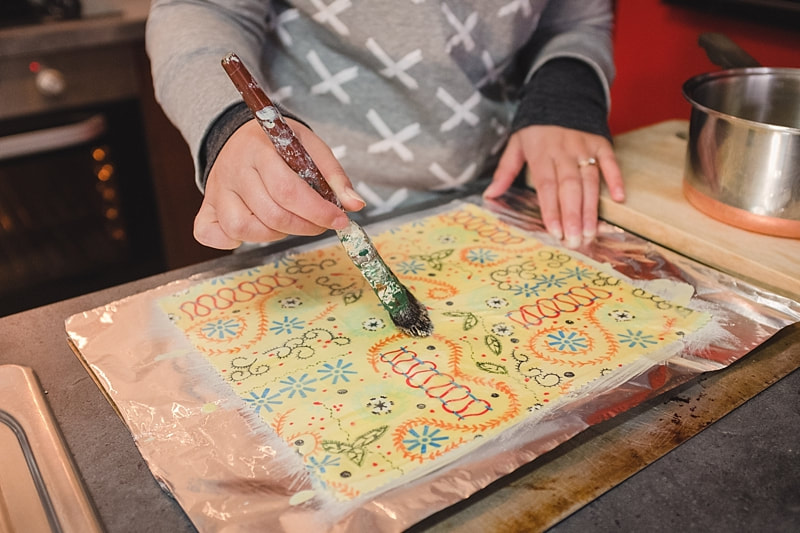 5. Place your wrap in the oven for about 3 minutes to melt in & evenly distribute the beeswax. In the photo below you can see the beeswax is still sitting on top of the fabric. You know the wrap is ready once you see the beeswax has soaked through and into the fabric. The fabric will look wet. While your wrap is in the oven replace your pot of beeswax mixture on the cooktop on a low heat to prevent it from cooling and solidifying. 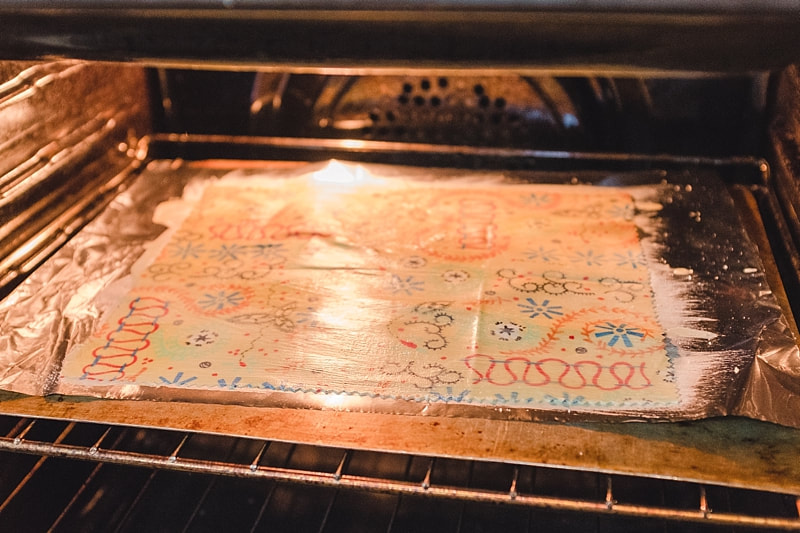 6. Remove from the oven and either using tongs or carefully using your fingers lift the wrap from the oven tray. Simply by holding the wrap in the air, turning it and fanning it gently, the beeswax will cool quickly. I took my wraps outside into the cool air to fully 'dry' them. If you find there's patches of fabric that haven't soaked up the beeswax you can apply a little more beeswax or just place back in the oven and allow the heat to continue evening out the beeswax. 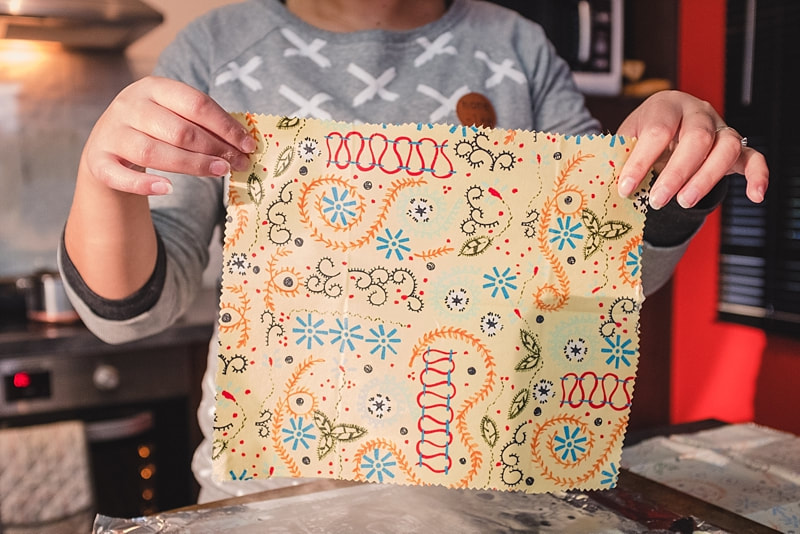 7. Once cooled and dry, your beeswax wraps are ready to use. They are best stored rolled or flat, not folded. I store ours rolled up in a mason jar on the kitchen countertop ready for use. Repeat steps 4-6 until you've completed waxing all your cotton wraps or until your beeswax mixture runs out. 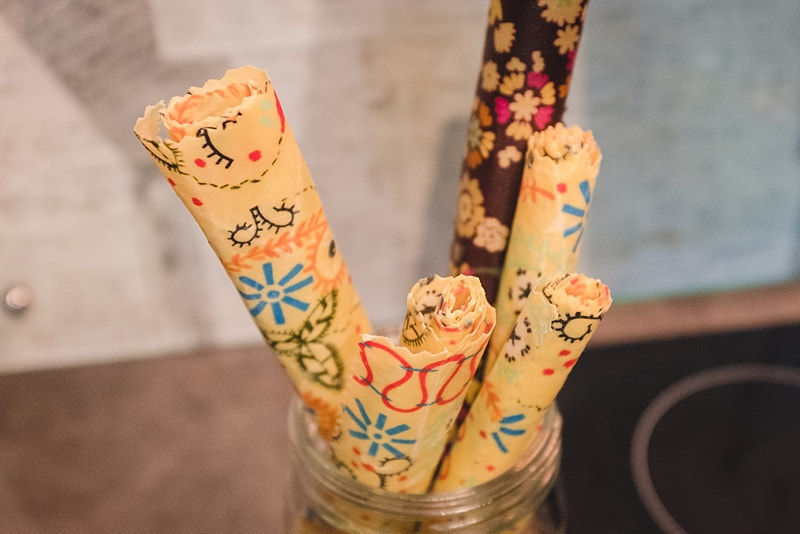 These beeswax wraps should last 6-12 months. If you find they are losing their cling factor or waxiness, you can place them back in the oven to re-distribute the beeswax. They will eventually need to be re-coated.
Remember to only wash them with cool, mildly soapy water, as hot water will move the beeswax. Lay them flat or peg them up to dry thoroughly after cleaning. And don't use beeswax wraps to wrap raw meats or wet foods as they can't be washed in hot water. Lastly, have fun with cleaning up your utensils and hands after making these! Beeswax is hard to clean up but I found if I wiped out my pots and utensils with a paper towel first removing most of the beeswax residue, the clean up was easier. Lots of hot water and detergent cleaned everything up well, but I won't be using my paintbrush for anything else besides making more wraps - so I definitely recommend using an old one!  UPDATE March 2019: I've been using my laundry powder recipe for almost a year now & still loving it! I've tweaked the recipe just slightly since first posting this blog - recipe below is updated for you. I have begun making our own natural homemade laundry powder! You might be wondering why on earth I would want to add yet another 'chore' to an already busy life right?! Well there's a couple of reasons behind it which I'm going to share in this blog post, plus my recipe if you want to have a go making your own homemade natural laundry powder! I’ve always been a bit of a label reader, interested about what's in the stuff I'm buying; from ingredients in food products to what garments are made of. But recently I've really opened my eyes to what we’re bringing into our home and our diets on a day-to-day basis. Knowledge is power and I've been soaking up documentaries, books and web articles on the topic. From processed foods to the chemicals in our cleaning products - there are so many things in supermarket products that I can’t even pronounce and have no actual idea what they are! Here's the ingredient list for a supermarket shelf brand of laundry powder: 5% to 15% Anionic surfactants, Oxygen-based bleaching agents; < 5% -Enzymes, Nonionic surfactants, Optical brighteners, Perfume, Phosphonates, Polycarboxylates, Soap, Zeolites, Butylphenyl Methylpropional, Citronellol, Eugenol, Limonene. Now just from my own limited research and knowledge I know that synthetic perfumes, phosphates, optical brighteners and some surfactants are hazardous to our health and are common causes of skin irritation. Making our own laundry powder allows me to know exactly what is being used to wash the clothes and linen that touch our skin every day. And skin is the largest organ of our body so I think that's important. Another reason for the switch to homemade laundry powder is that we’re consciously trying to minimise in our household how much single-use plastics we’re consuming. We don’t tend to think about all the products we buy like laundry detergent or fabric softener when we discuss the world's plastic issue. The first thing that comes to mind is plastic bags and water bottles, but all our cleaning products tend to come in plastic containers these days that are just thrown out when they’re finished to make room for a fresh one. And I've worked out that making my own homemade natural laundry powder is going to cost about 40c per load. Which is on par with the eco-brand laundry detergent we were using. 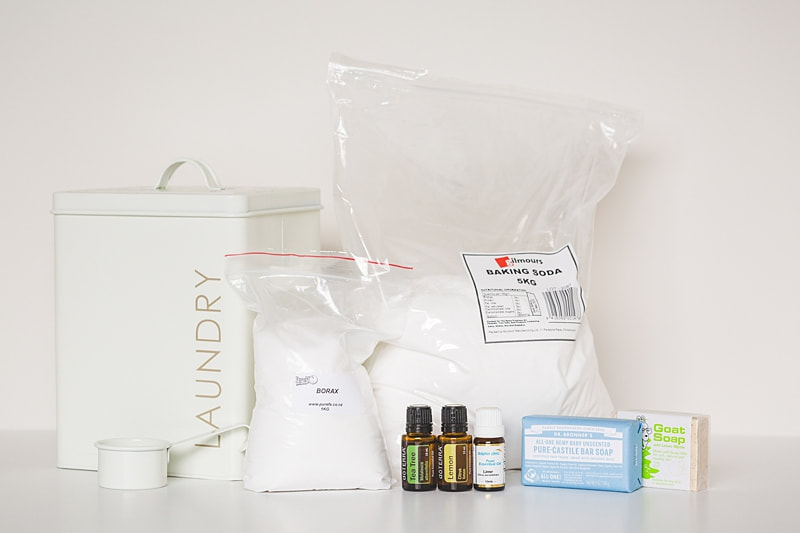 YOU WILL NEED:
HOW TO MAKE:
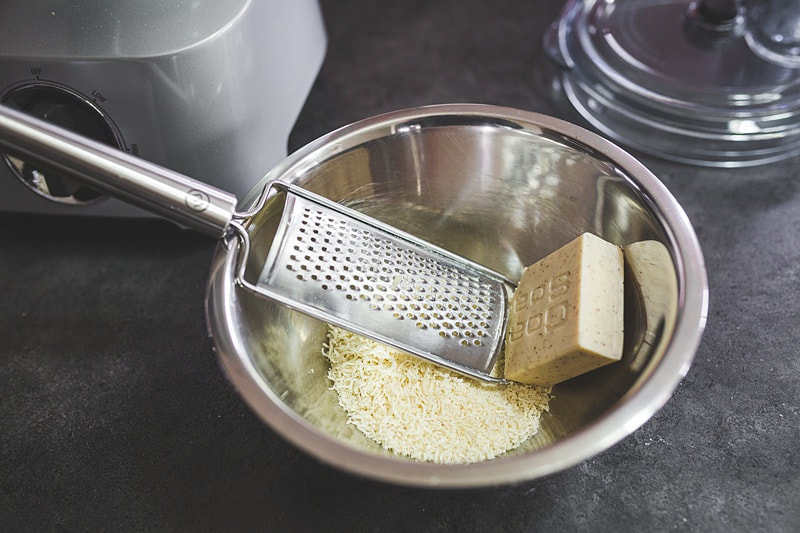 Grating the soap is the intensive part, but all up it only took me 10 minutes to make a batch of laundry powder which is going to last me about 40 washes. And you could easily make double the mixture in one batch - my food processor was nowhere near full. 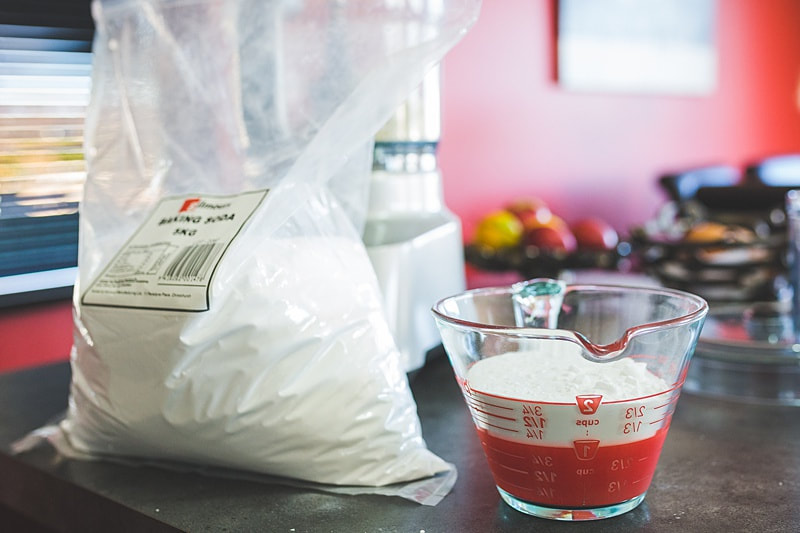 Wondering where to buy the ingredients?
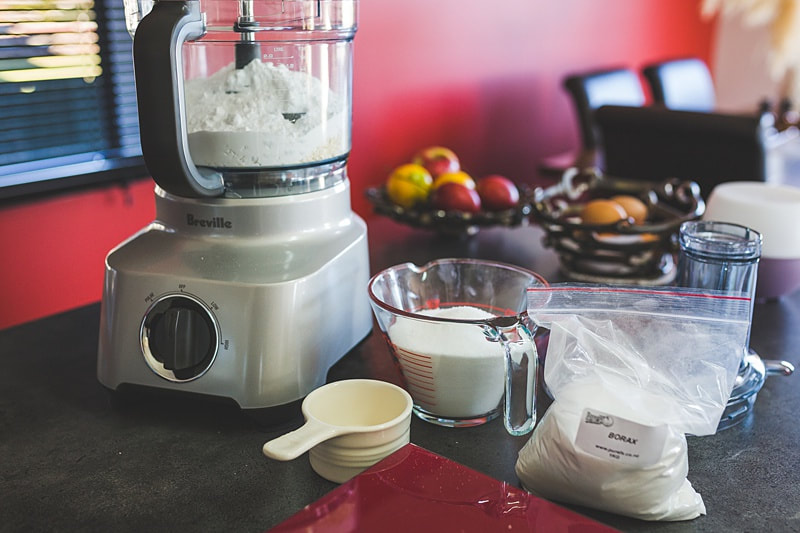 Some articles online suggest using an old food processor to make your laundry powder in, but I figured everything I put in it for my laundry powder recipe is a cleaning agent so a good scrub out with hot, soapy water afterwards had me more than happy to use it the very next day for baking. If you're worried about the borax powder in your food processor just add it at the end into your laundry container. There's a plethora of natural homemade laundry powder recipes out there to choose from. 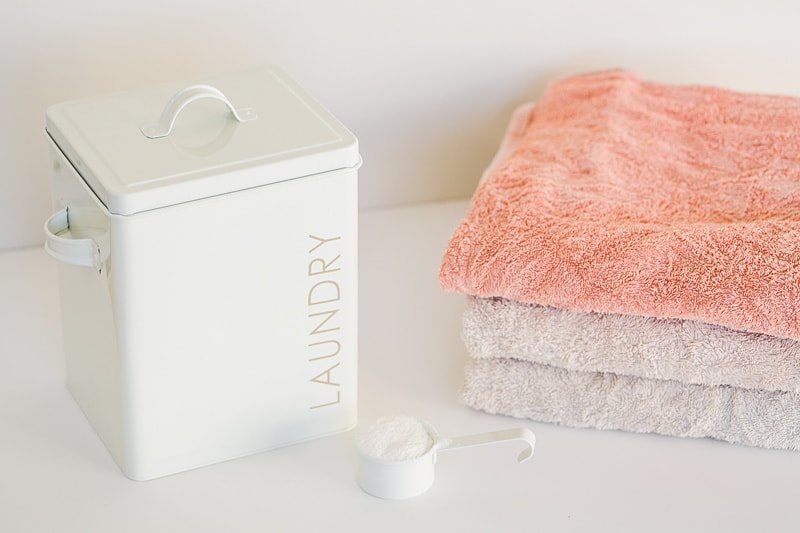 Lastly, did you know you can add white vinegar to your washing machine's fabric softener dispenser as a cheaper, safer alternative to store bought fabric softeners?? I tried this just this weekend on my towels and I can attest that it works well! And it doesn't make your towels smell like vinegar I promise. They come out fresh smelling and soft.
If you have any questions leave me a comment! x |