 What would I do differently? It has to be one of the most frequently asked questions I get about how we created our lifestyle block here at Devon Cottage. And I am all for learning from mistakes and sharing anything I can about my experience that might help others in their endeavours! So today I’m sharing the number one piece of advice I have for anyone looking to build/change/expand a garden in their backyard or starting out with a blank canvas wanting to create a homestead lifestyle… I wouldn’t change a thing about our house design (almost 5 years on and I’m still just as in love with what we’ve created as the day we moved in!), but I would perhaps have done things a little differently with the landscaping and gardens. We had a very blank canvas to landscape with a bare grass half acre section. And I just wanted to get stuck in and build out gardens, put in the tunnel house, plant fruit trees and establish our own wee Nirvana. But if I had my time again I’d have paused just a little to observe before getting stuck in doing all the things. I sometimes get messages from followers and friends telling me they’ve bought a new property and want to set it up for homesteading, or that they’ve got a backyard that has just been lawn for years and they want to start growing their own food - where should they start, what tips do I have for setting it up etc. And here’s my first piece of advice; spend some time observing your property before you do anything. Where does the prevailing wind come from? Is there existing shelter? Does the section slope? What does this mean for water catchment? Do you have boggy patches in Winter? Spots that don’t get any sun for months? Where does the frost lie all day? What areas really dry out in Summer? Are there any wind funnels? You can quickly see from these questions that to get a true observation of the nature of your backyard it can take a full year of seasons. This can seem like a long time to just sit back and observe and if you’re anything like me, you want to get going NOW. And there is a balancing act here because I also firmly believe in just having a go and learning as you do so. Plant a vegetable garden and get growing for sure, but if I can save you from re-digging and replanting unnecessarily then I highly recommend doing some observation before planting trees and adding heavy infrastructure. We’ve had many trees & shrubs struggle, suffer and sometimes die because they were exposed to too much wind or needed under planting done to protect them etc. I’ve spent a lot of time having to dig up wet areas and add drainage. We’ve moved many plants to different spots. Many of these things could have been avoided had I spent a little more time observing first. It’s always going to be much easier to work with nature than try to fight her! If you can either take an aerial image of your property, or sketch out a birdseye view, and begin making some notes about the seasons, the prevailing weather, the wet areas, the contours etc and along with your ideas for where and how you want your homestead or garden set up you’ll begin to get a really clear picture for the best way to set up your backyard to work best for you! Here’s a sketch I’ve done just recently as I plan to expand our gardens (yet again) and after 5 years of observing the seasons I have made these plans with wind shelter in mind, ideas for what to do with the shady area behind the house, what parts of the yard we enjoy spending time, where the sun sits, what does well in the chicken run etc. (Sketch done in Procreate on my iPad).  If you’re starting out or making plans to change/expand your homestead or garden I’d love to know if this is helpful? And I’d love to see your plans, hit reply and send me your ideas - it’s always so fun hearing about likeminded souls doing awesome things in their own backyards!
Until next time, happy homesteading friends! Heidi x 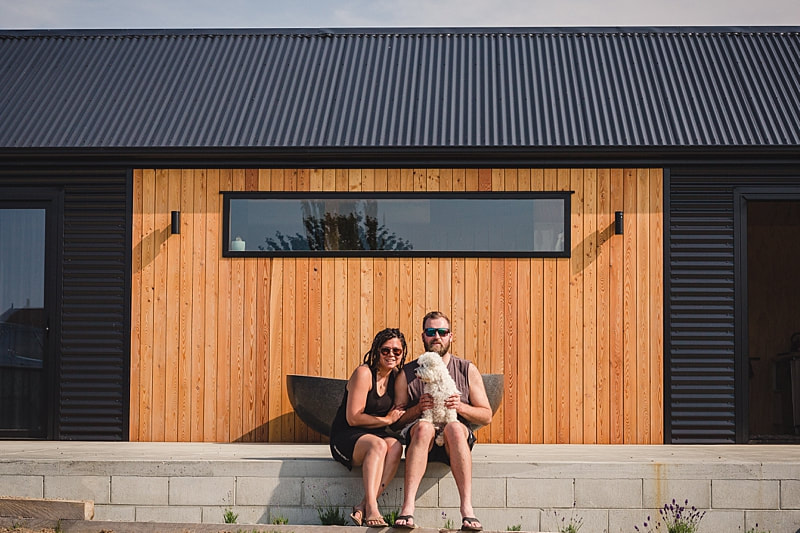 We've been in our house almost 6 months now and it feels like we've been here forever. This house so quickly felt like home and I know that is because everything about it was a conscious decision on our part, making it totally our own. We often find ourselves saying to each other how easy this space feels, how much we love being at home, coming home after work and how good it feels to live here. I've begun to truly realise that there is an appreciation you feel once you rid yourself of the excess. Everything around us is simple, beautiful and purposeful. 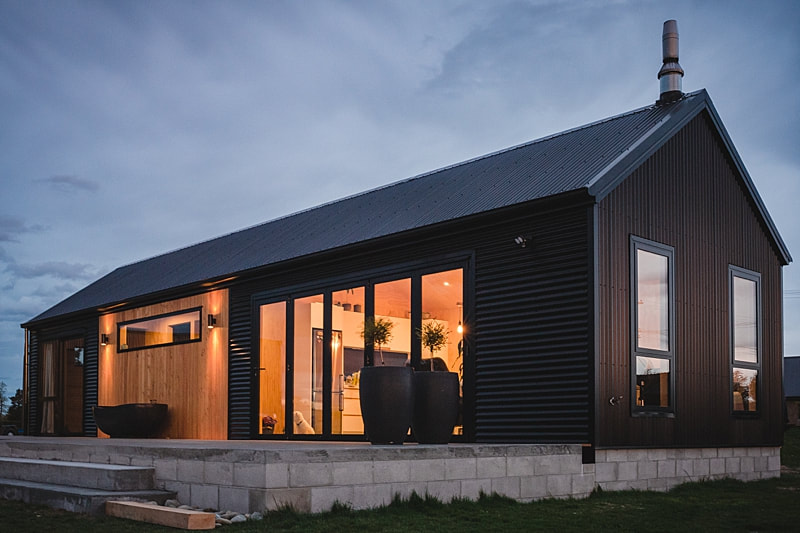 Design & buildPeople ask us if there's anything we'd change about our house now that we're living in it. I can't think of anything. That's the beauty with a custom design and build - it is exactly the way we wanted it to be. It might not suit someone else but it fits us perfectly. With that being said it was definitely daunting building a house that we'd designed ourselves because it wasn't a tried and tested off-the-shelf plan. There were many moments where I wondered if we'd got measurements right or whether our vision would work. But after just a few days living in the house we were content with how everything turned out. The house doesn't feel cramped or small - and I believe that comes down to the design. From the pitched ceiling to the big windows. Sliding doors rather than conventional swinging doors. A luxuriously big shower and a kitchen bigger than the one that was in our four bedroom home! This house might be less than a third of the size of an average home but we think it packs a punch. The build itself we're pretty darn chuffed with too. There's not a single element of our home that let us down us quality-wise and I remember with our first build that there were many. This time around we made very conscious decisions about the businesses & people we wanted to work with and it paid off. We can't recommend the team of tradespeople we used highly enough. In some cases this meant we paid a premium but typically you get what you pay for when it comes to service and quality. It took just over 6 months to finish the build, which at the time felt like forever for a small build, but in reality considering the winter weather we were battling I think we did very well. Building over summer would have been much easier but there are drawbacks to each season, and while we cursed the wind and rain many times throughout the build the cooler weather was kind in that our exposed concrete floors didn't crack during curing. If there is one thing we'd do differently with the design and build it would be to have spent even more time in the planning process with some of the technical aspects. The convoluted drainage channel system that was required between the house and same level concrete deck cost us thousands more than we'd expected. Similarly my design choice to have horizontal runs of corrugated cladding on the house meant thousands spent in labour & flashings purely for a look. Had we known how much some of these design choices were going to cost us and what headaches were involved with meeting building code compliance for certain things we may have chosen a different option. But hindsight is a wonderful thing and if that's all we can complain about I think we're pretty lucky! In summary we are very happy with the design and build. The companies and people we worked with helped us create a home that we couldn't be happier with and we are so thankful. Our advice for anyone looking at building? Spend a lot of time on the planning part - it will be time well spent when you get to the build phase. Try to visualise yourself living in the home and how the design will work functionally, not just from an aesthetic viewpoint. And carefully consider your contractors and remember the cheapest quote isn't always the best option.  Materials & productsThere's a number of reasons why we went over budget for this build but the main reason was our choice not to compromise on the materials and products we used. While it wasn't easy to see the budget being blown to pieces this house is intended as our forever home and we didn't want to later regret not having it made the way we dreamed it to be. We could have saved thousands by having a cheaper shower, but we dreamed of the luxurious tiled shower. We could have had a kitset kitchen but this is the centre of our home and we are so pleased we did a custom kitchen to suit. We could have picked cheaper carpet for the bedroom, we could have selected a lower grade plywood for the walls, our eco-fire choice was pricey and we could have gone with a cheaper quote for all windows but we made conscious choices with the materials and products in our home. Even so we did definitely compromise on some things; we could have picked even higher grade plywood or gone with pre-sealed sheets, we opted out of argon gas for our windows, I didn't get the brand of kitchen appliances I dreamed of and we did glass wool insulation rather than a more eco-friendly product. It was a constant battle trying to balance our dreams, must-haves, wants and budget. I'm sure it's like this with any build, big or small. But it was all on us this time around because I was managing the project and the budget. Last time we built we had a fixed price contract for the build and we picked material and product choices from a set list given to us by the building franchise. When it's a custom build suddenly a whole world of material and product options is open to you and it was sometimes overwhelming trying to make decisions. Our material and product choices involved weighing up cost, aesthetics, future maintenance, eco-friendliness, time-savings, budget priorities and future costs. 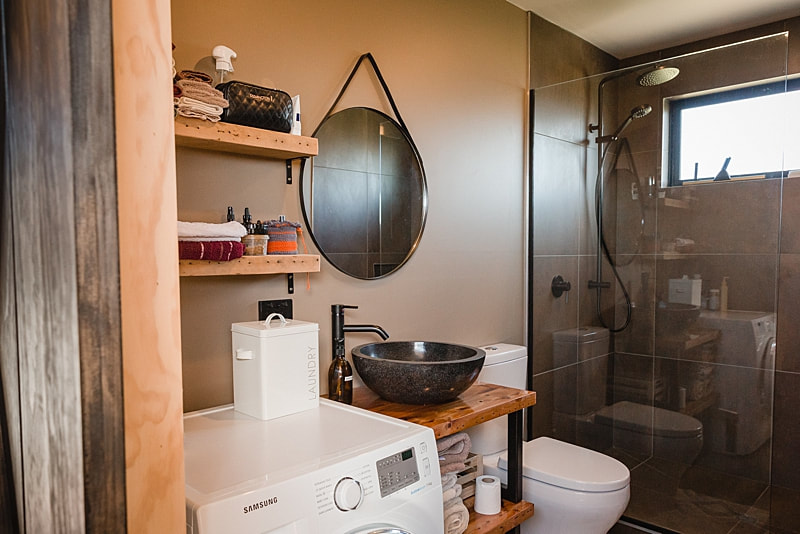 Final costThe final cost of our house build is sitting around $220,000. This excludes the cost of land, the shed build, landscaping and costs of connecting to services (water, sewerage, power & phoneline - which will differ for every build & location). I have included the cost of the concrete deck in that amount which almost doubles the footprint of the build. You could build a 65 square metre house for less than what it has cost us. I'd estimate you could save $25-50k on choosing different materials, cheaper products and components. But for us this would have meant not getting the forever house we dreamed of. Also because it was a custom design and build we had to pay for that. An off-the-shelf plan would be cheaper and time-saving. Some of the things which might surprise you about the cost of the build: Plywood isn't cheaper than GIB itself, it just meant no gib-stopping and painting bills. We saved thousands of dollars by doing as much as we could ourselves like putting up the plywood & polyurethaning it, bathroom gib-stopping & painting, also sanding & sealing the concrete floor. If we didn't have to satisfy council building requirements we would have saved close to $20k in costs that did nothing to improve the actual build so I can definitely see the attraction of tiny houses on wheels, not to mention how frustrating & time-consuming it seems to be having to deal with the council when building. We've managed to shave over 15 years off our mortgage by down-sizing from a house that was excessive to our requirements. And in the process we've built our dream forever house. This house has allowed us to take a huge step toward financial freedom, it's given us time back because it takes mere minutes to do chores instead of hours and it's taken away some of the stress we had because life is simpler now. There were many meltdown moments during the build (mainly with blowing the budget!) however it has all been well and truly worth it. Of course that's what you'd expect us to say, but we have no real regrets. We made very little compromise with this build and while it might have cost more than we'd initially hoped we've achieved the house we wanted. 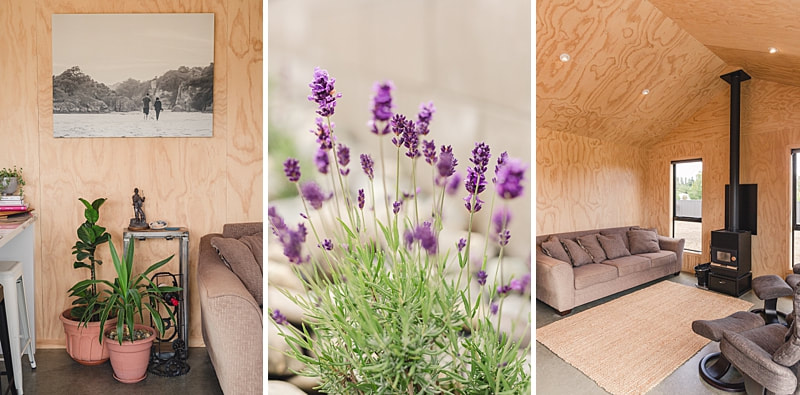 So what next?It feels so good to have the house complete and to just enjoy living in it. Every day we appreciate this home we've built. At the end of 2019 we also came up with a name for our home. I'd always wanted to name it but it took a while to both agree on a name that fit the place. Devon Cottage - for the street we live on and the small house that it is. We're going to have the name of the house etched into some corten steel panels which will go on the end of the deck finishing off the fence. Next up is the landscaping which is going to be a work in progress for many years. We recently had the fence put in and we're re-sowing grass, planting fruit trees, with the first vegetable garden to go in shortly too. From there we'll add a tunnel house, herb gardens, along with more trees and shrubs as time and money permits.  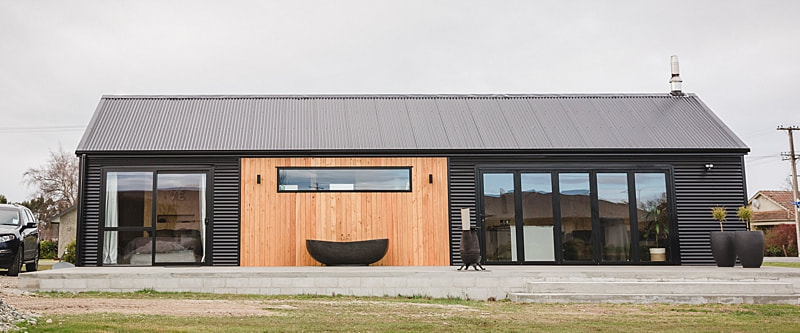 I've taken some photos of our wee house at last! Between actually finishing with the build, shifting in, taking some time to settle in and running my photography business I just haven't had the chance to do this until now. Walking around our home taking these photographs this morning nearly brought me to tears - happy tears! It's finally sunk in that we've done it. This is our home! Our dream has been realised. We're living it. 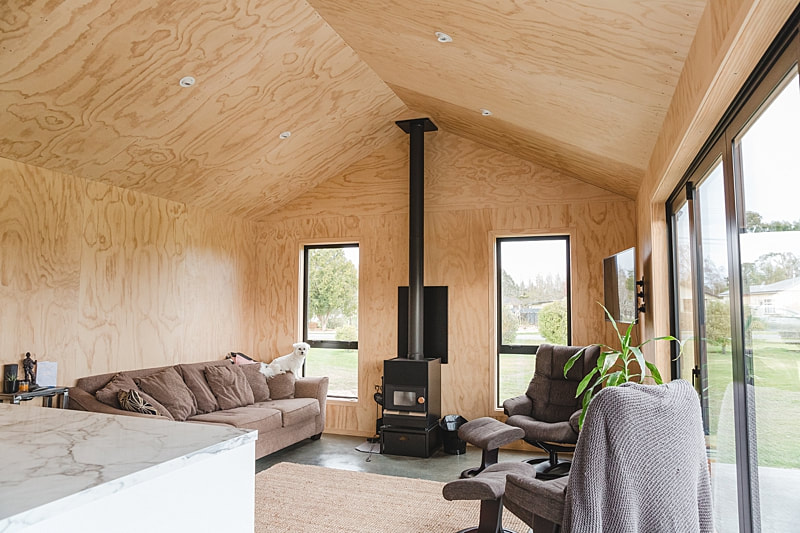 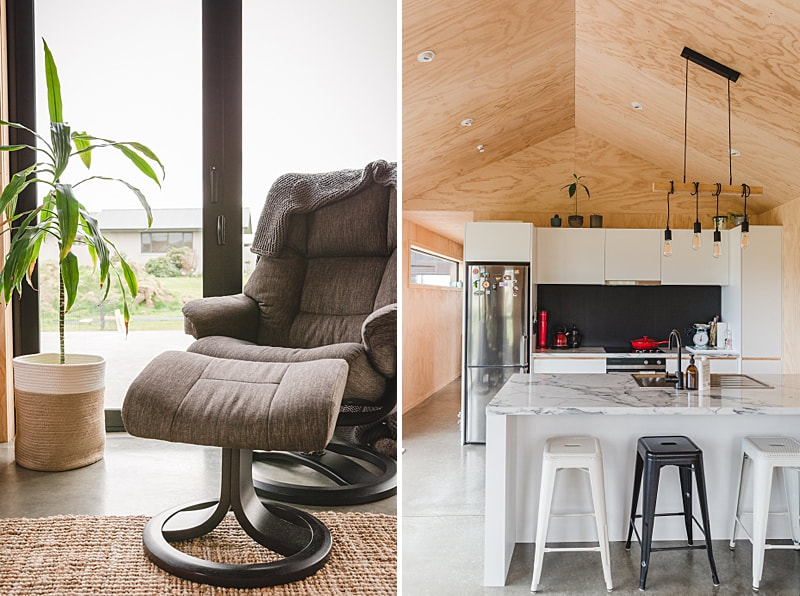 The home might be just 65sqm but we definitely don't feel like it's cramped or tight. Each area in the house has been well thought through.  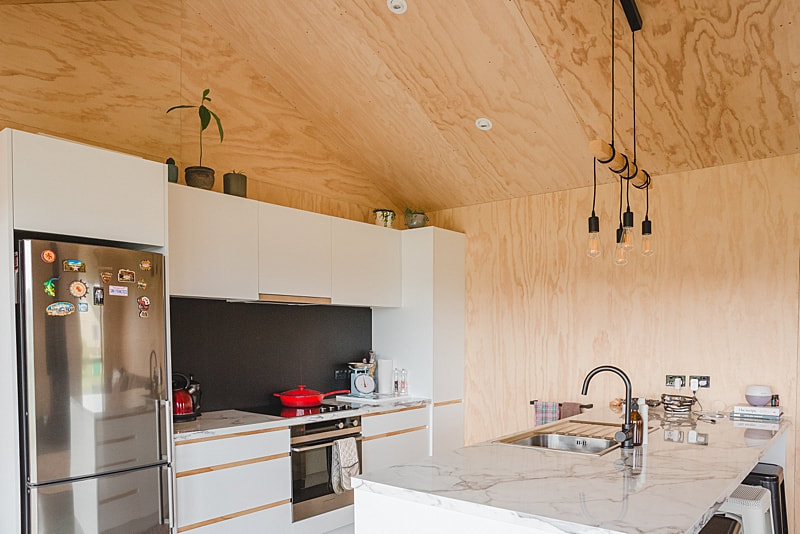 The use of plywood for our walls and ceilings is probably the most talked about component of our interior. People either love it or hate it. We love it, that's why we did it. The texture it adds and the variation in the natural grains of the wood suits the look we wanted. 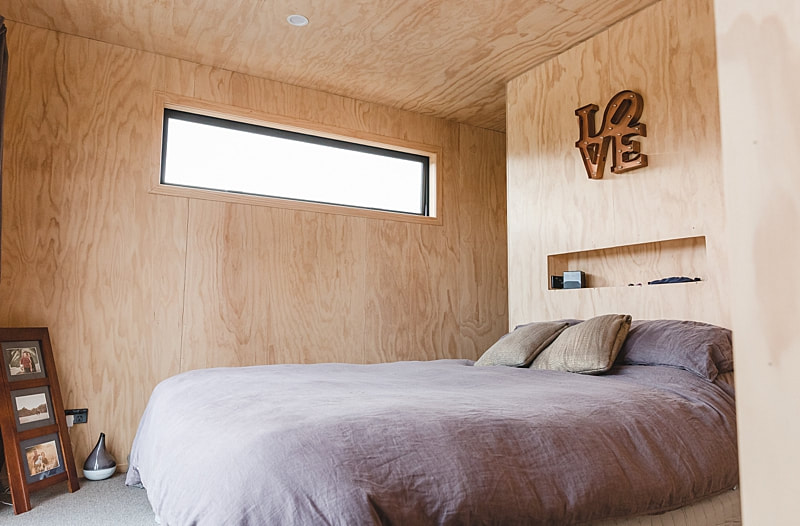 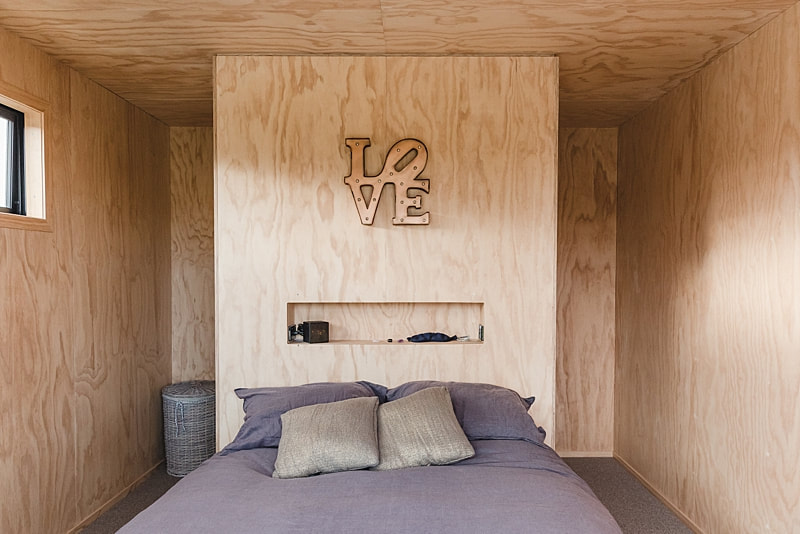 Our bed headboard wall doubles as a walk-around wardrobe. Designed by us, made by the clever Regan at Elite Joinery Solutions. 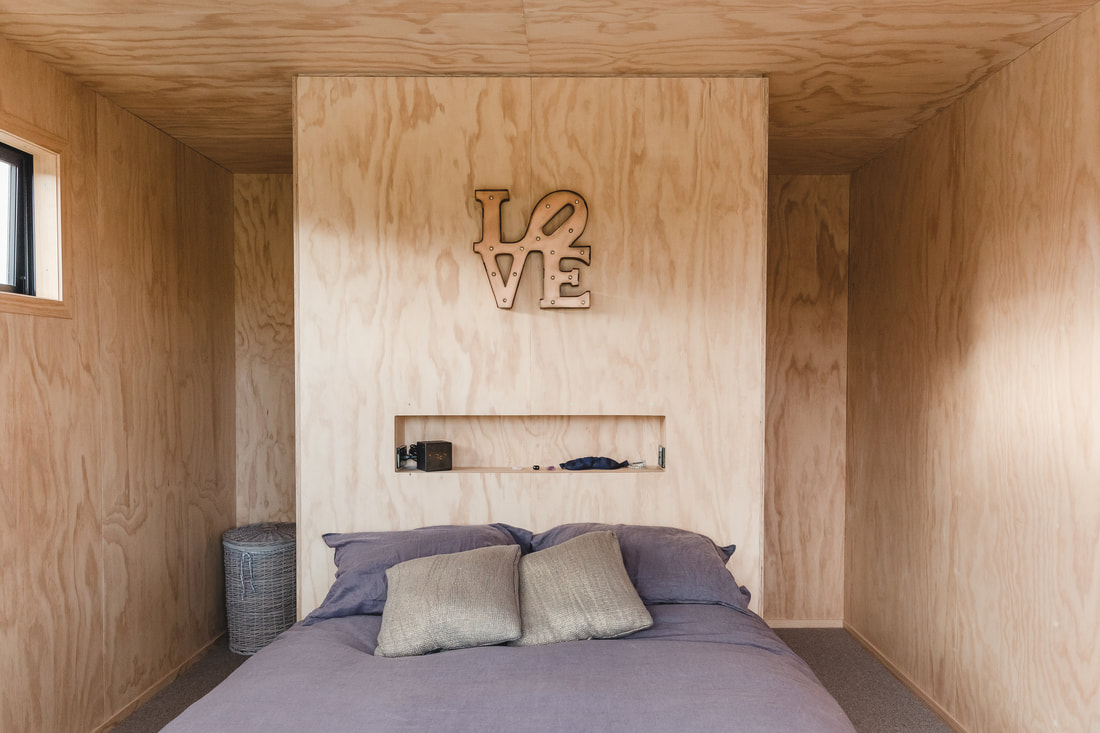 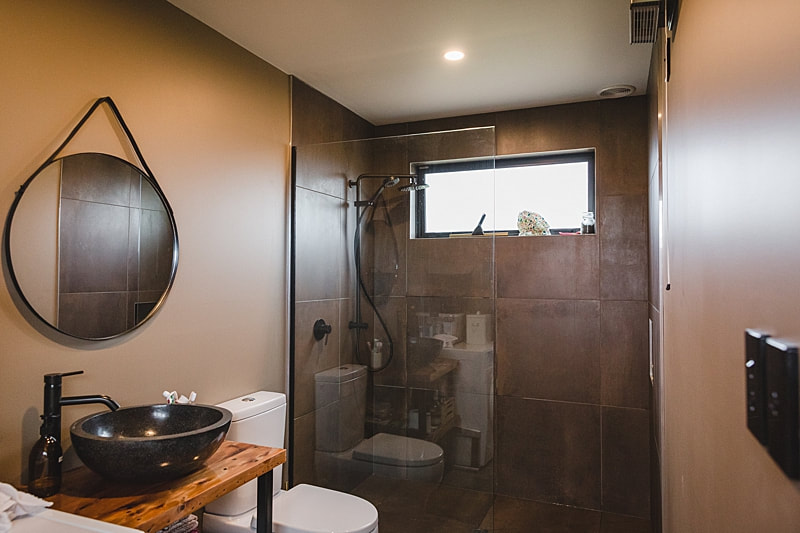 We've still got laundry shelving to go up in the bathroom and some towel hooks - all of which are going to be custom made by us. The bathroom is our only room in GIB so I decided to go bold with the colour tones in here. The walls are Dulux Nevis Valley, the ceilings Dulux Cardrona. Black fittings throughout and a one of a kind vanity unit made from reclaimed rimu and steel, with a stone basin that matches the outside bath. 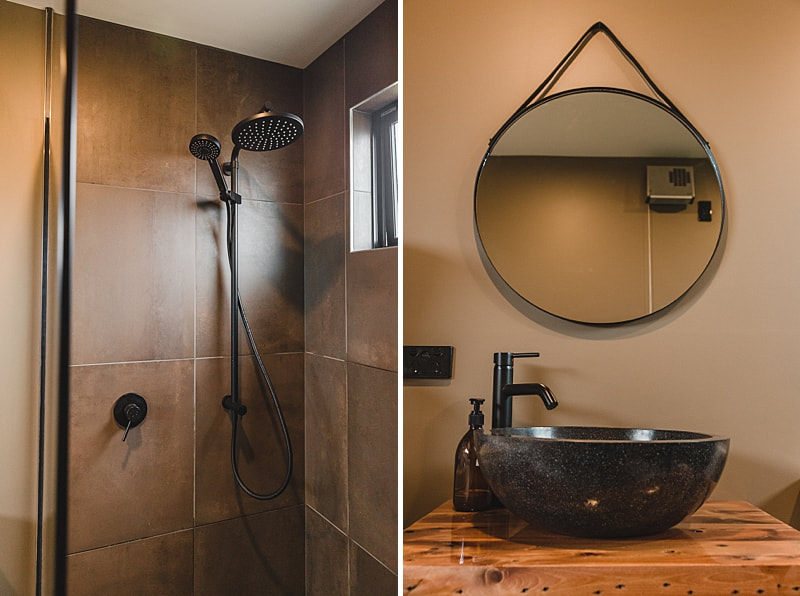 One strategically angled shot of my office because that room is still a mess with boxes of sentimental items & seasonal clothing etc that will eventually get put up into the roof space for storage. This room is also home to the linen shelving and hot water cylinder (no we didn't go gas - another common thing we get asked about - our reason: one day we want to install a solar system, so gas would be a utility bill we couldn't reduce, where as electric water heating we can). 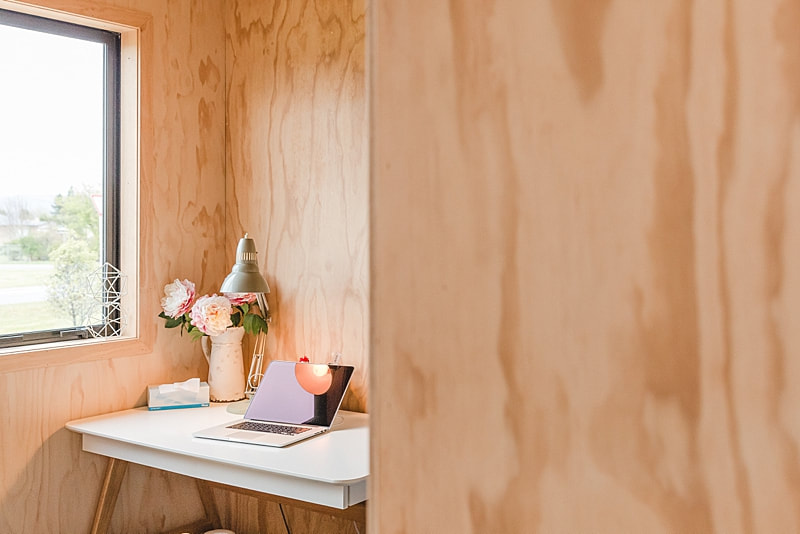 The much talked about outside bath tub! This beauty came from Indonesia and is a composite of crushed marble and resin. We've plumbed hot water to it and use it just like you would an indoor bath, except that (to the relief of the neighbours) I wear togs! 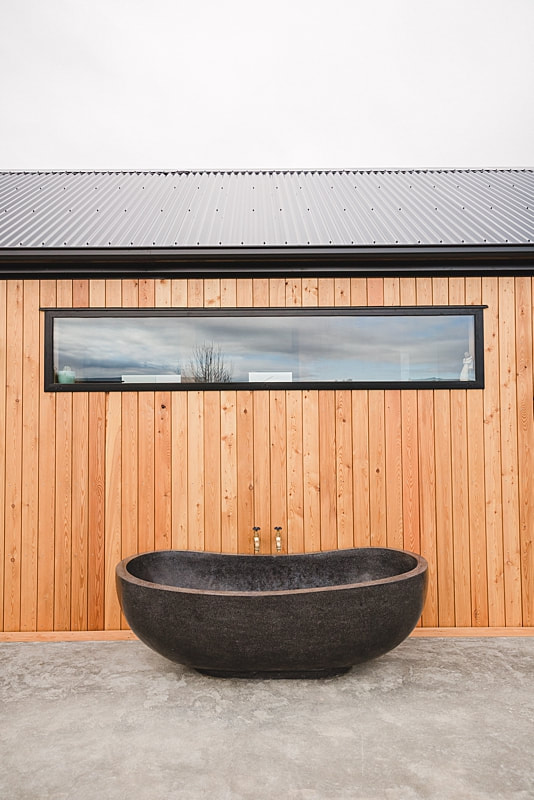 It feels like every part of this home is 'my favourite thing about the house' haha but that Siberian Larch feature on the front is a definite highlight, breaking up the black but complimenting it at the same time. Our builders (Wilson Baird Building in Riversdale) did an incredible job with the exterior and while the changing runs of horizontal & vertical corrugated cladding were one of my most annoying design ideas logistically I think it's SO worth it. 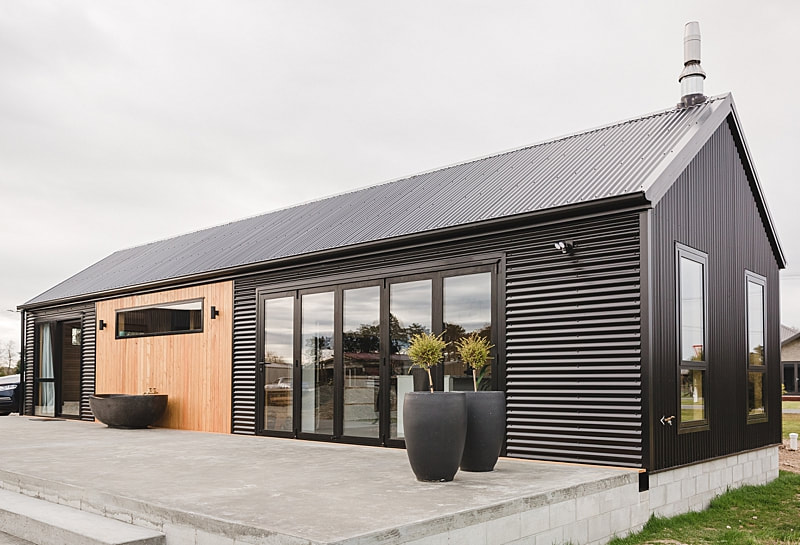 We can't wait to put Matt's custom made outdoor furniture on the deck ready for summer days with the bi-folds stacked open. And soon the task of landscaping will begin. More photos to come as we continue to get settled and do the final finishing touches.
 I am so behind on blogging the progress of our house build! But now that we're all moved in and the chaos is over I plan to catch up and share the last couple of months of building which were a crazy blur of busy. Matt ended up taking most of August off work (man are we lucky he has an awesome employer!) and we were on the building site ourselves an average of 80 hours a week, from dawn until well after dusk every day. In August we were ready to start fitting out the interior. The electrician and plumber ran their wiring and piping through the walls and then it was on us to insulate and begin putting our ceiling and walls up. Proof of how much of a blur this part of the build is the fact that we didn't take many photos because we were so busy just getting shit done. While builders straightened walls and began on the exterior cladding Matt and I were learning how to do all sorts of things as we went; installing ply sheets, gib-stopping, painting, sealing concrete floors, installing the drainage channels brackets, foaming up windows, putting on architraves and skirting boards, making the bathroom vanity, putting up the Siberian larch weatherboards and being general labourers to help the builders with any jobs we could. 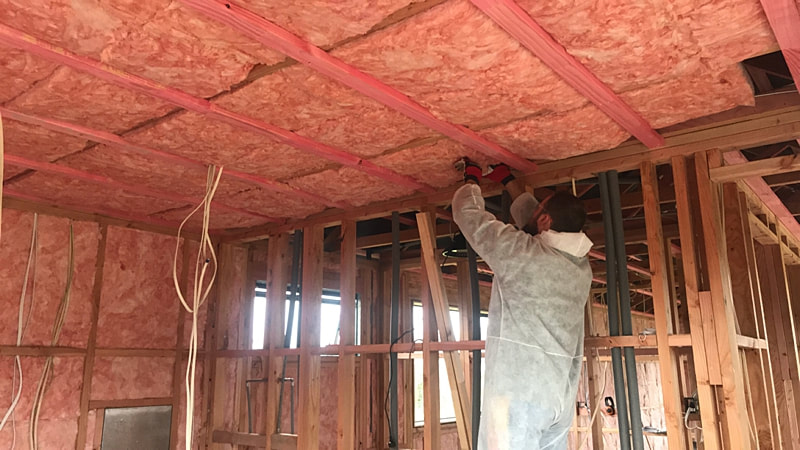 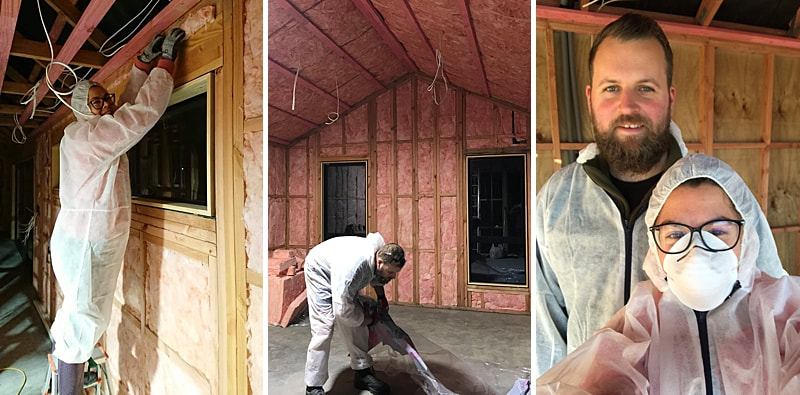 I was so glad we were only building a tiny house - the insulation for the ceiling and walls was all done in one weekend! Putting up the ply walls was another story. There was so much planning, measuring and double-checking involved with every sheet. And then we had to polyurethane it all! 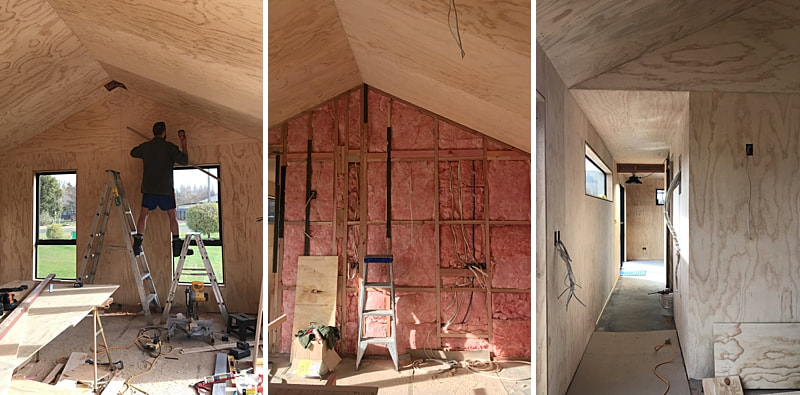 And let's not forget how much of a test the weather was for us. Building in winter had more than it's fair share of challenges - with high water tables causing excavation nightmares, rain delaying concrete pours and wind holding up the roofing and cladding installation. 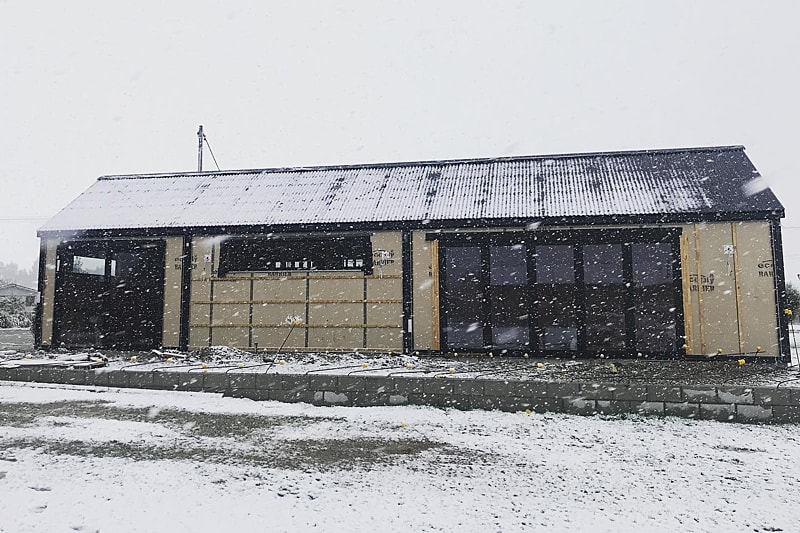 Countless late nights spent working and countless takeaway meals on the run! There's no denying that this part of the build was one of the most stressful times of our lives! Every last blood, sweat and tear went into building, but we did enjoy being hands on and it was very rewarding to know we played such a big role in creating our forever home. At the end of each day we could see the progress we'd made and that kept us going. We had a vision of how the house would look and I think it took most people, even our builders, until near the end to truly see what we had envisaged from the start. 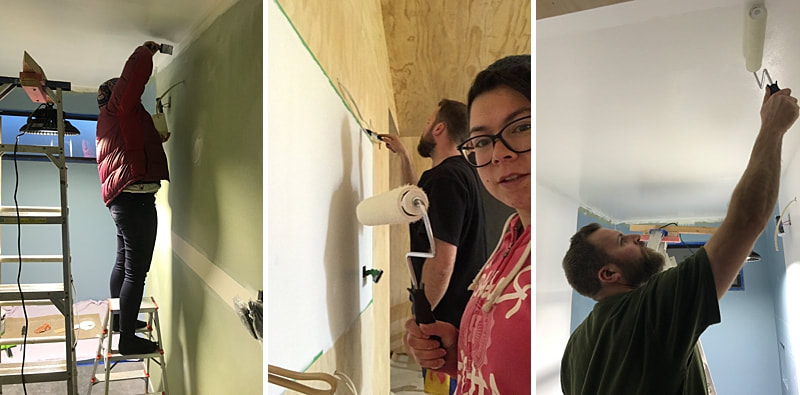 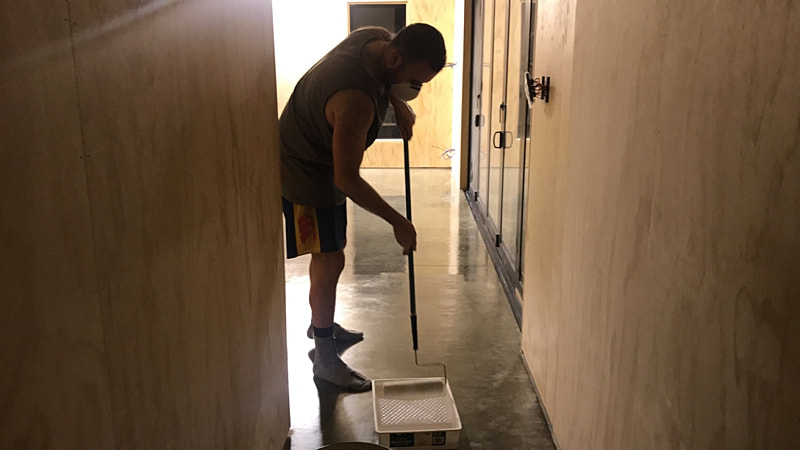 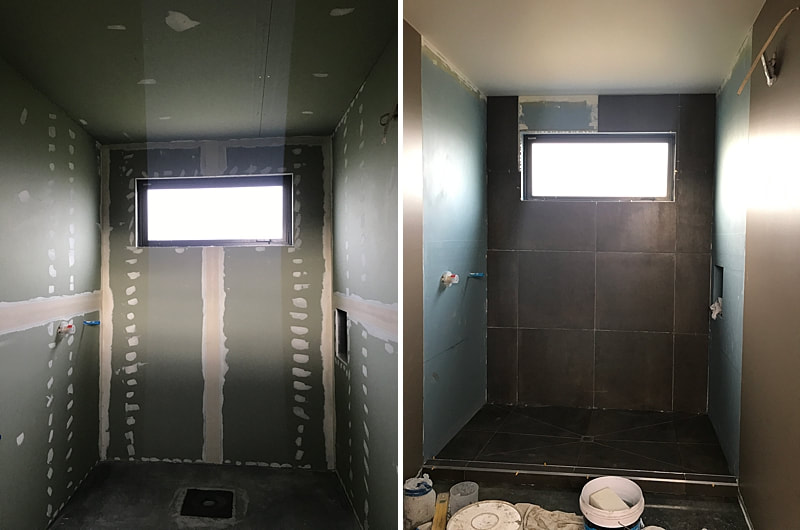 I googled how to gib-stop the bathroom - it's not perfect but I was pretty pleased with my efforts. Painting the bathroom was a team effort (would you believe I had never used a paint roller before?!). Matt chose some expensive Italian Corten steel look tiles for the shower and they're utterly gorgeous! Adrian Van Uden's team did an incredible job of the tiling for us. Regan from Elite Joinery Solutions, not only made our beautiful kitchen but also helped us with a number of other projects in the home including these rimu slabs which I then poured with resin while Matt made steel frames which would become our vanity unit. 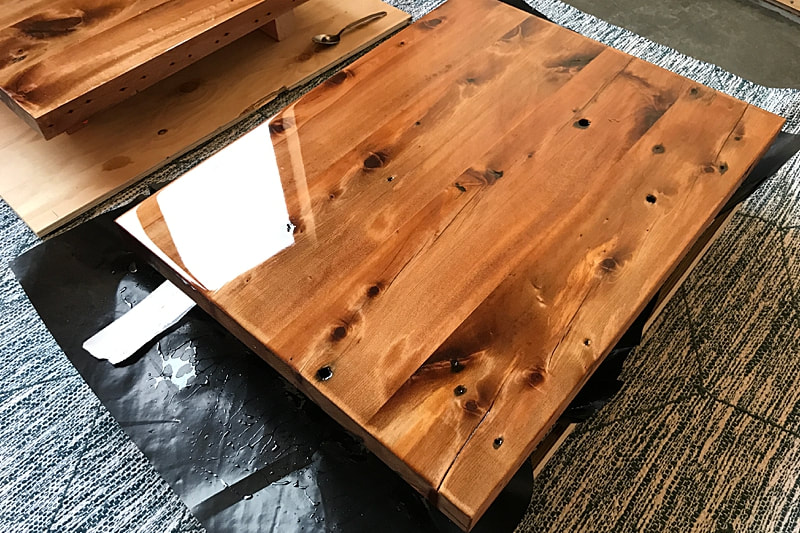 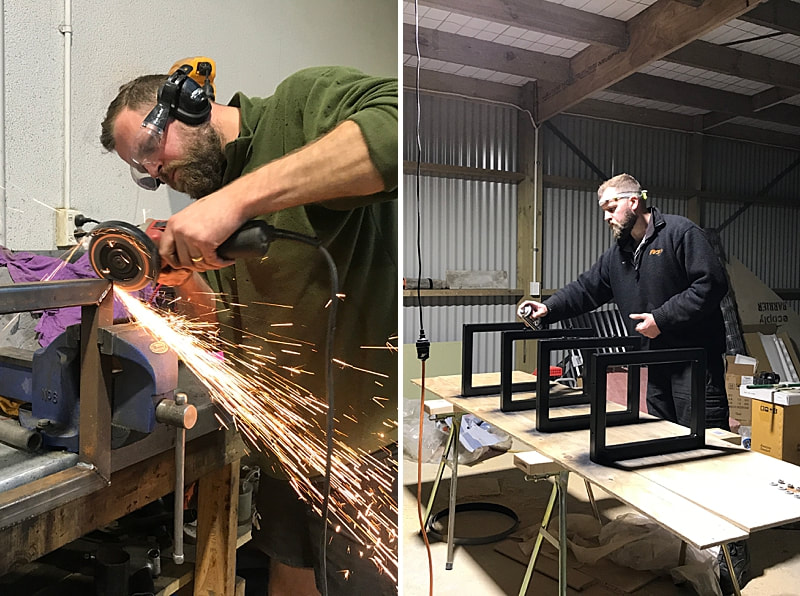  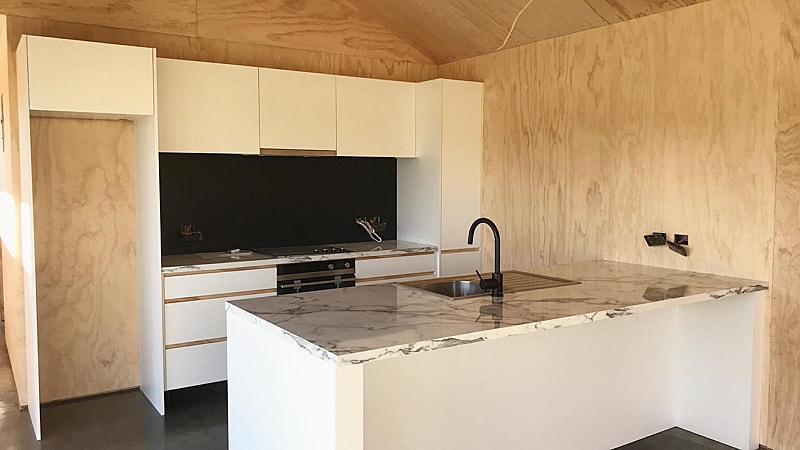 Matt and I had our fair share of 'heated discussions' during the build but we're lucky that on the whole we work pretty well together. One thing I will say is that project managing a build is SO much more intense than I was prepared for. This stage of the build just became all consuming and my head was filled with one massive to do list. Added to that was managing the budget! I was often overwhelmed with the full responsibility for all the decisions I was making and the consequences of those decisions at times. But we haven't been living in the home a month yet and already we've both said it was all worth it. Well and truly. While final fitout of electrical and plumbing began inside, the outside was all coming together too with the cladding and utilities. 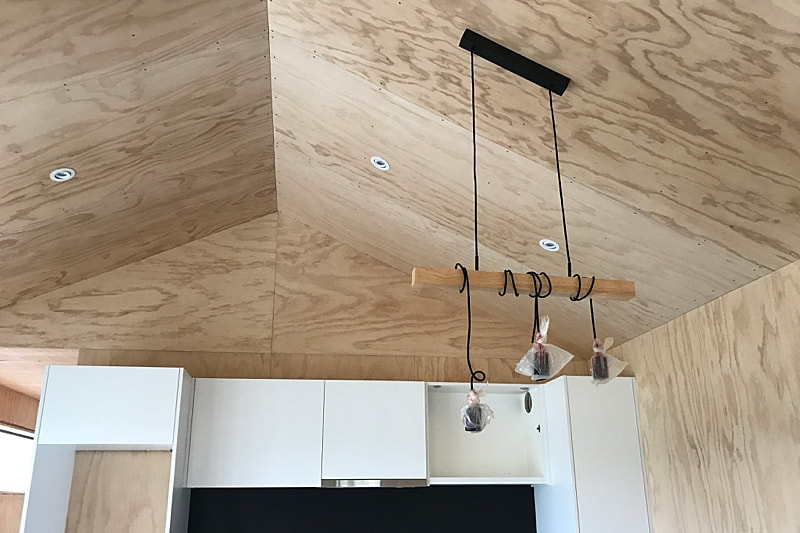 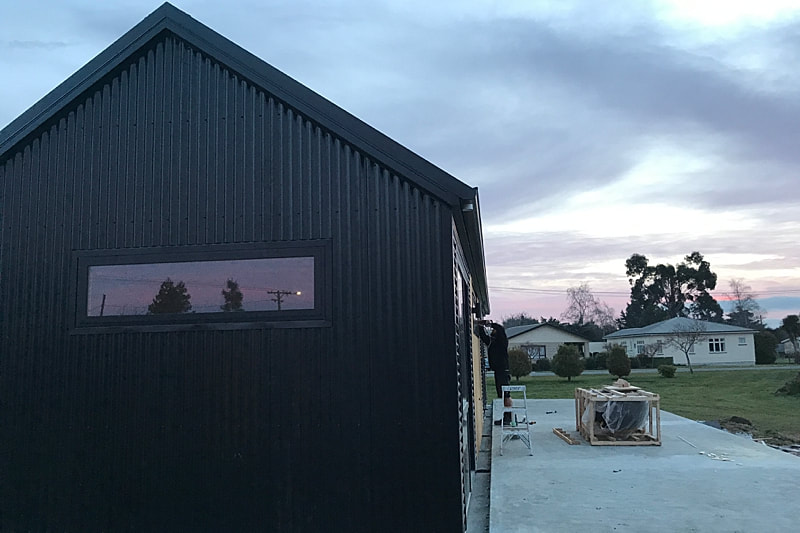  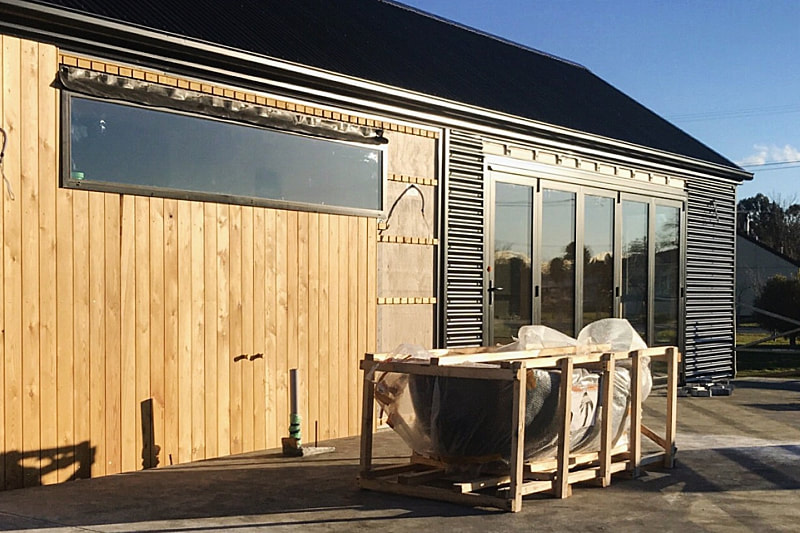 We can't thank all our tradespeople enough for the huge efforts put in to getting this build over the line! Gavin and his team at Wilson Baird Building, Matt of Henson Electrical, Nick from NG Plumbing & Heating, Lindsay Roy for the all the earthworks, Regan at Elite Joinery Solutions, Adrian Van Uden, Gore Flooring Xtra, Ben at Thwaites Aluminium (& Rolly!), Brennan at Southern Concrete Cutting for all his advice and of course Josh at MAS Architecture for taking my hand drawn plans and turning them into a real house design for us.
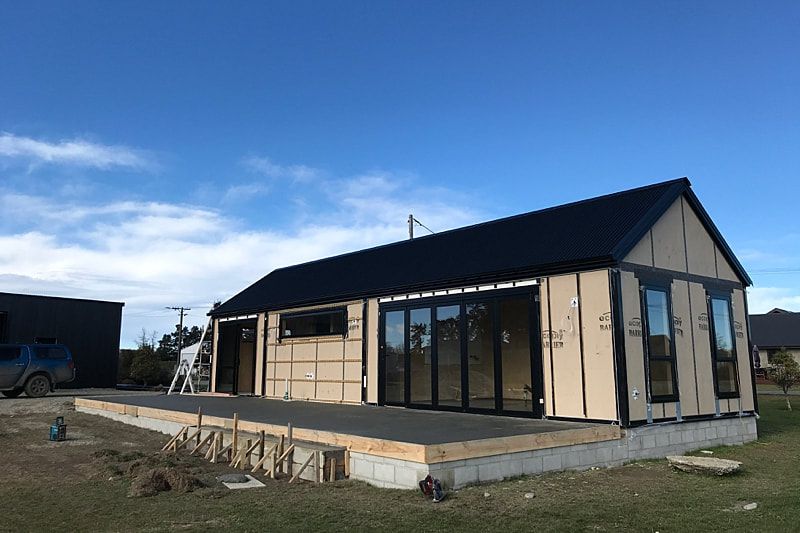
Thank you also to all the beautiful people in our lives who dropped in to see us while all of this craziness was in progress and delivered care packages of food, fed us meals, helped us with a paint brush, lent another pair of hands to whatever job needed done, let us borrow tools, helped us lift stuff and just generally raised our spirits with your company & good banter. We love you. We appreciate you. And how cool is it that this house already has our friends & family as part of its story? The windows & doors went in last week. This week the pre-wiring and plumbing was done. And this weekend Matt and I have a whole lot of insulation to install! What a relief it is to no longer be weather dependent. Not that we've had much time to really stand back and let the fact that we're well over half way through this build sink in! Instead we've been busy (often long in to the evenings) working on pre-lining tasks, preparing the concrete floors and making decisions on interior fixings & materials. It has been all go. I thought I had most things sorted for this part of the build but it turns out that having it planned in my mind or on paper is entirely different to having things ordered or actually organised! This week has been a whirlwind of phone calls sorting everything from concrete sealer to siberian larch weatherboard profiling. I've done walk throughs with the electrician and picked up our tapware. We've spent more hours than we want to count cleaning back the concrete floors ready for sealing (the concrete floors are a whole other story!) and each night I go to bed exhausted but with a million things racing around in my mind. Still, while there's a bit of stress involved with overseeing so many aspects, making decisions and trying to manage the dollars going out as well, I am wildly happy every time I set foot in the house. This is going to be our home and it's looking beautiful. 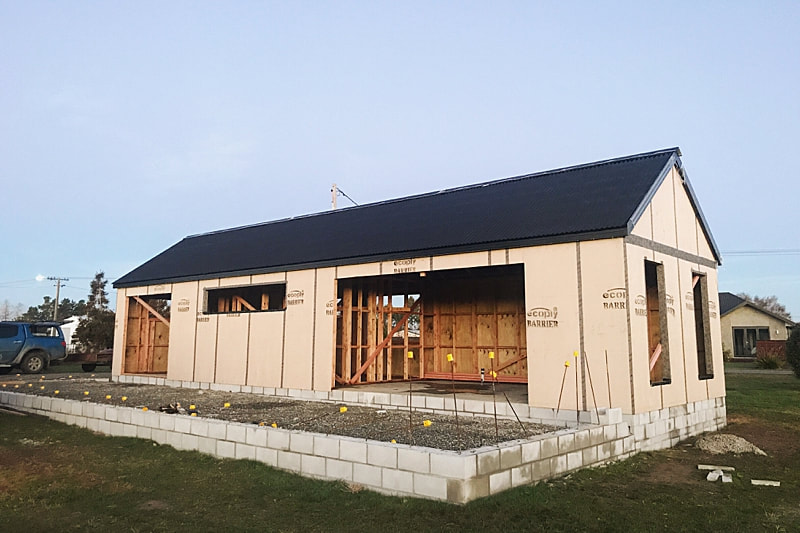 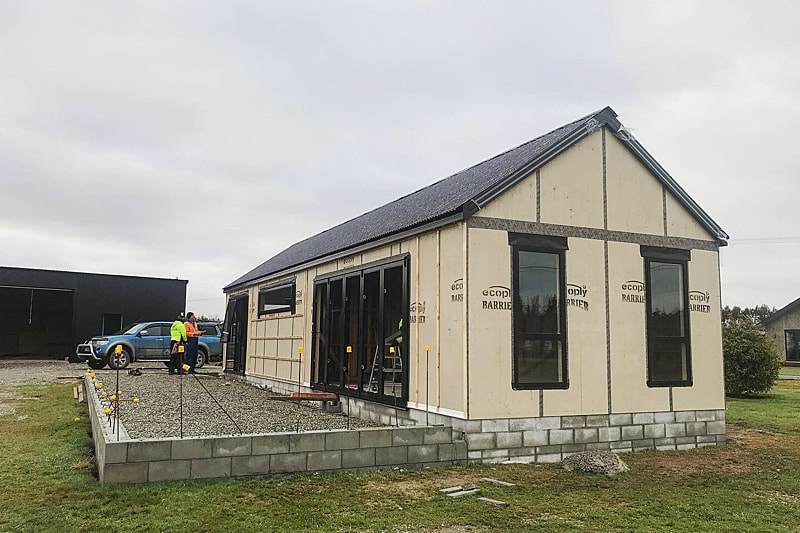 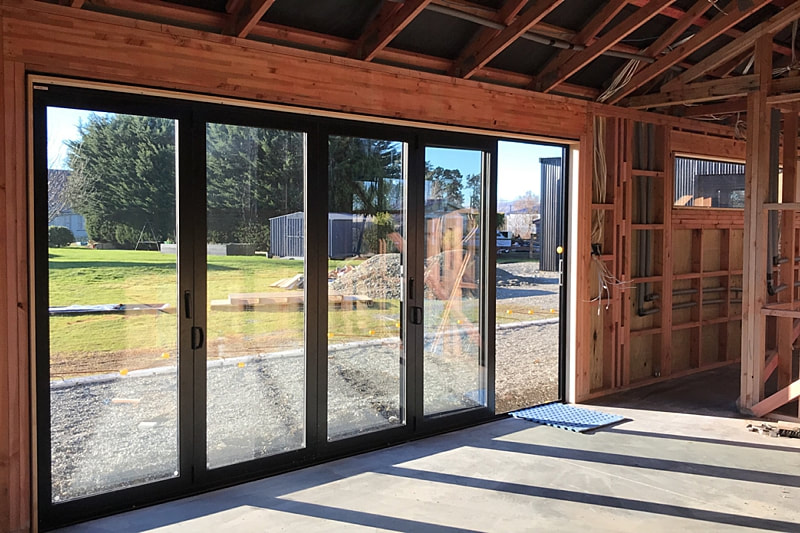 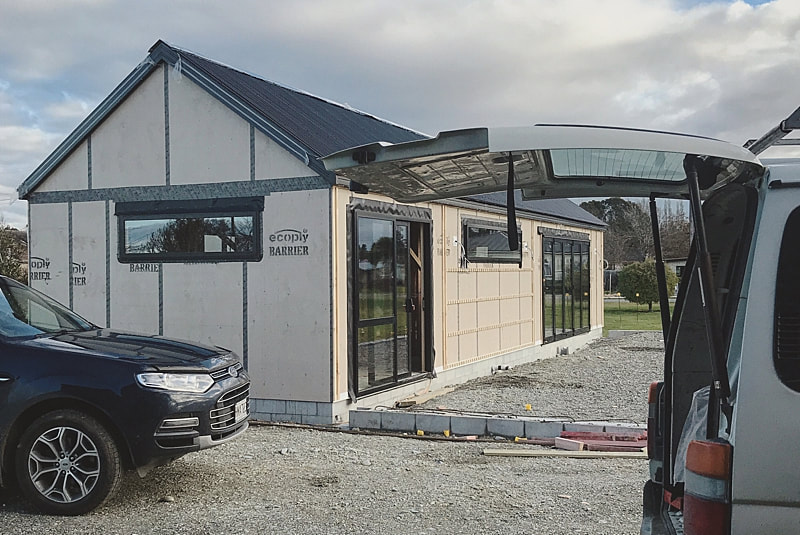 The roof is on! Which naturally called for a few beers after work yesterday.
This milestone feels like a halfway point. The structure is pretty much done and once the windows go in we'll be closed in. I'm so looking forward to when we begin working on the interior. It just feels so real now that we have walls and a roof! This is also the point where Matt and I get to do a bit more of the process ourselves - would you believe me if I said I'm excited about doing the insulation?! Haha I'm sure the novelty will wear off fast! But how good does that roof look?! I'm so pleased we stuck with black coloursteel - we tried to find an off-black shade that wasn't quite so bold but we just kept coming back to plain black. It's striking but it's not as in-your-face as I worried it would be. When we designed the house I also had reservations about the house length and roof pitch. I didn't want the proportions to be out and thought it might look too long and pointy but now I see it in 3D I realise there's nothing long about this house - it's tiny! 🤣 And I love it. 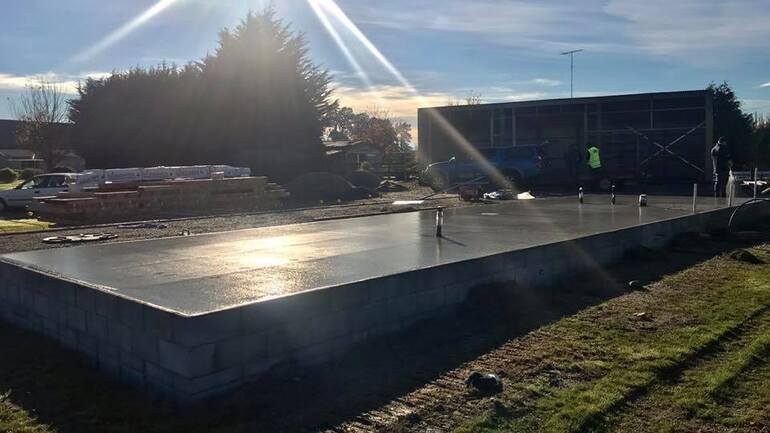 We are officially out of the ground! Today the concrete got poured for our house and we're pretty darn excited. Anyone that has built before knows getting out of the ground is one of the longest, slowest parts of the build. And what with crappy winter weather we've had recently it feels like we've been waiting for this day for a while. But it's happened & we're so excited to see it all progressing.
I thought now would be a good time to share why we went with a tiny house on foundations rather than the very popular tiny house on wheels.... When we really started talking seriously about downsizing, we first looked at the idea of tiny houses on wheels (THOW). This is the most common type of tiny house and examples of incredible THOW's can be found all over Youtube and social media now. Many people choose THOW's because of the ease of being able to move their home if they need to. The pricepoint of a THOW is often more attractive because you don't have to own the land. And of course being on wheels means you fall under transport regulations, not building regulations (although this is a grey area & is likely to change). Not having to build to specific code & go through the rigmarole of council consent is obviously attractive (having just gone through this process ourselves we can certainly see why people try to avoid it & the costs involved!). The reason we decided a THOW wasn't for us is because the mobility of the house wasn't a priority for us, we still wanted to own some land and being on wheels has it's design restrictions because your home has to stay within set road-legal dimensions. We briefly looked into container homes, another form of a tiny house. This is where we kicked our ideas up a gear and got in touch with our builder to quiz him about the logistics of building with containers. We quickly realised from talking to him and doing some more research that while it may seem cheaper to use a container versus conventional building materials there are drawbacks and factors that need to be added into consideration. You're also limited by the dimensions of the container/s which reduces flexibility for the design. In the end we decided on a more conventional to-building-code house on foundations - just a really small build compared to the average NZ home (which is now over 200sqm!). This way we could design a floor plan that worked perfectly for us without making compromises, we'd have a home that was easily insurable, equitable and built to NZ building standards. We'd still be 'in the system' as such (owning land, connected to services etc) but we'd get a home that would last us our lifetime and we'd be able to achieve financial freedom much faster than had we stayed in our big house. Building a tiny house on foundations definitely has it's drawbacks too though and won't suit everybody going down the path of going tiny. Because it falls under building regulations you have all those costs to add in. Having to adhere to those regulations also means you might have to forego some amazing tiny house design ideas (such as a simple ladder up to a loft would instead have to be a compliant staircase). Going off-grid with your services (such as a composting toilet & greywater systems) isn't going to be as easy when having to be signed off by council. And it could be tricky to find land that you can build tiny on because of minimum size restrictions in certain regions. That's the beautiful thing about tiny houses - they're specifically unique to the people living in them. What works for some, won't work for others. We are so excited to live in the space we've designed uniquely for us. And today we are one step closer. The number one question we're getting asked on the daily at the moment is how is the build coming along or when do we think we'll be in our new home. It's exciting talking to people about our tiny home and getting to share our journey. It's cool to see such an interest in what we're doing. And we're so flippin' excited to see it all start to come together. We talk often about how amazing it is going to be living in a house we've designed, somewhere we can see ourselves being for the rest of our lives, a home that is going to give us the life we're dreaming of! But I realised recently that each time people asked me about the build progress I was constantly thinking of timeframes and targets rather than the beauty & fun of the build itself. Over the last few months of getting out the other side with consent and then starting the groundworks I found myself getting stressed and worried every time something took longer than expected, materials didn't turn up on time or the weather stopped work for the week. I laugh now at how I naively thought we'd be out of the ground by Easter! I've slowly learnt to release any expectations of timing. Sure it's important to have a loose timeline so all the contractors are on the same page but in terms of when certain stages will be done & when we'll be shifting in... all in good time. There never was a hard set deadline anyway and we want to get it all done right, rather than rush it. And you know what - that mindset shift has made the build immediately less stressful and so much more enjoyable. Letting go and just being excited about the small steps forward each week doesn't come naturally to me as I'm such a planner, but it totally aligns with what we're also trying to achieve with this build. 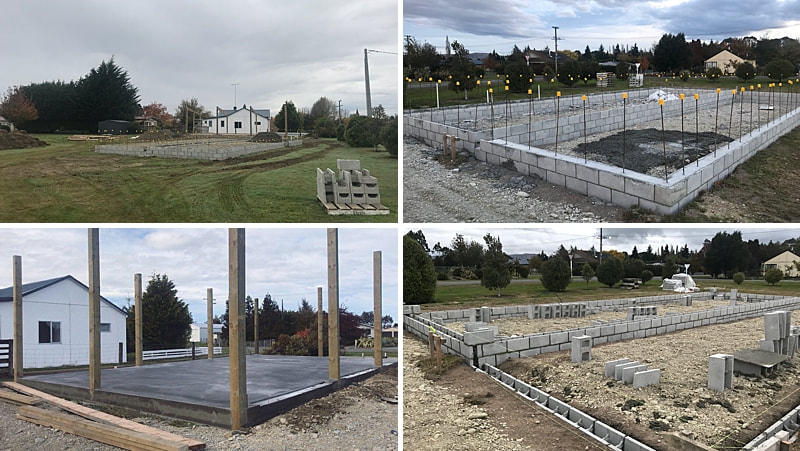  Cleaning pasteThis beauty is my go-to for any hard to clean areas or when I'm doing a deep clean! From getting burnt on food off pots, to getting the sink shiny again. I use it in the bathroom to scrub grime and soap scum off surfaces too! I love this cleaning paste. PLUS it's so simple to make and lasts for ages! Place 1 cup of baking soda in a small bowl (or straight into whatever air-tight container you're going to keep this paste in, a jam jar or honey pottle works great) and then add about 1/4 cup of castile liquid soap (I use Dr Bronner's). [ie: 4 parts baking soda + 1 part castile liquid soap]. Add in 10 drops of essential oil if you want - try peppermint or anything citrus. Mix together until it forms a thick paste. Add a little water or more soap if it's a too dry. Store in an air-tight container and use as you need it. I find a small teaspoon size dollop is all I need for most applications. Apply to dirty surface & scrub, you can add a little water or cleaning spray (below) to surface as well to help the paste along. Cleaning sprayThis spray lives on the bench because I use it every day when wiping down kitchen surfaces. I used to love using store bought spray & wipe with the 'pretty' smells but now I have this more eco-friendly, safer alternative I haven't looked back. And I love knowing the beautiful smell is essential oils and not fake, cheap fragrances derived from chemicals! Add 1 tbsp of baking soda, 1 tbsp of castile liquid soap & 10-20 drops of your choice of essential oils (use ones that have cleaning or disinfecting properties like tea tree, lemon, peppermint, eucalyptus or rosemary) to a spray bottle and then top up with water. Shake well before each use to re-combine all the ingredients. Disinfectant spray / glass cleanerThis spray does two jobs - great for cleaning glass and it also has disinfecting properties with the vinegar and lemon essential oil. Now who doesn't love a multi-tasker?! I use this spray on windows (or pour a 1/4 cup into my bucket of hot water, along with a little castile liquid soap, if I'm doing a full window clean), bench surfaces, chopping boards, toilet seats, door handles etc and I spray my cleaning brushes & scrubbers with it before dousing them with boiling water to disinfect. Simply half fill a spray bottle with white vinegar, then add filtered/boiled/distilled water to the top. (ie: 1 part vinegar + 1 part water). Add 20 drops of lemon essential oil (a natural degreaser, smells divine and is known for it's antimicrobial qualities). Pop the spray trigger on top of your bottle and you're done. Shake well before each use to re-disperse the essential oil. When using as a disinfectant spray just apply to the area and leave to dry. When using to clean glass (or stainless steel) spray on then buff off with a cloth.  A year ago today we announced to our family and friends that we were selling up. I remember the excitement of putting our plans into action. The nervousness of putting our beloved home on the market. And then I remember the frustration of waiting for it to sell. It took over six months which felt like forever! Ha. Now one year later as we break ground on our new section and get excited for the next chapter, I appreciate all the life we've lived in that year. I'm grateful that we took the leap and began living our lives on our terms, creating the life we dream of. We might not be there yet but I am reminded that it is all about the journey itself.
Ever since I can remember I've been a pretty driven person, always just wanting to get on and do whatever it is I'd put my mind to. I like to think I'm self-motivated. Others might call it impatient. I left school at the end of sixth form because I was ready to start a career rather than 'waste' another year in school! I've never shied away from a challenge (unless it involves heights) and I don't let fear of the unknown hold me back. Build a house at the age of 20 - sure. Quit my job to pursue photography - yip. Sell said house to go tiny - shit yea! I definitely prefer to be taking action rather than resting on my laurels (as Dad would have said). I've talked a little about our decision to sell our house & go tiny but there's so much more to this journey that the square metre-age of our home. It's about lifestyle. We realised we were spending huge hours working to pay the bills. Did we really need to have this huge mortgage for another 20 years? We'd be 50 by the time we owned our home out-right and that seemed like a lot of life to be spent paying off an excessive asset. We dreamed of a lifestyle that let us do more travelling, spend more time with friends & family and the freedom to enjoy our hobbies. We realised a way to achieve more of this good stuff in our life was to downsize our home & in turn our debt. As we looked at alternative living our eyes were opened to new, different possibilities. We talked about selling up and just renting, we looked at nomad living travelling the world, we talked about the advantages & disadvantages of a tiny house on wheels or a house bus. We weighed up what we loved about our current home and what we could do without. Now I'm not advocating that everyone should start getting rid of their possessions or sell their home! But I am all about living your best life and prioritising the things that bring you happiness. Perhaps you want to travel more, or maybe pay off a loan. Want to start your own business or learn a new skill? The biggest step you can take is to start. Don't just think maybe one day you'll do it. Make a plan, set some goals, start saving, enrol in that course - whatever you've got to do to begin the journey. Life is for living. If there's things you want to achieve or changes you need to make to live the life you dream of then start today. x |